How to Add a StreamRio Overlay to Streamlabs

Image source: Streamlabs official Browser Source documentation, saved locally for educational setup guidance.
If you want StreamRio reactions to appear on your livestream in Streamlabs Desktop, the setup is simple: copy your StreamRio overlay URL, add it as a Browser Source, set the source size to match your canvas, then test a few events before going live.
This guide is written for streamers searching for how to add an overlay to Streamlabs, how to add a browser source in Streamlabs, or how to use a StreamRio overlay URL in Streamlabs Desktop.
Quick Setup
- Open your StreamRio dashboard.
- Connect your live platform and configure at least one Trigger Rule.
- Copy your production Overlay URL.
- In Streamlabs Desktop, open the scene where you want the overlay.
- In Sources, click the plus button and choose Browser Source.
- Paste the StreamRio URL.
- Start with a compact Browser Source size, such as 600 x 750 for a character companion, then scale and position it beside your camera or gameplay.
- Place the Browser Source above your gameplay, camera, or capture source.
- Trigger a test event from StreamRio and confirm the reaction appears on stream.
What Is a Browser Source in Streamlabs?
A Browser Source lets Streamlabs render a webpage directly inside your scene. That is why it is the best way to add web-based overlays, alert widgets, animated stream mascots, chat tools, donation widgets, and real-time StreamRio reactions.
Streamlabs describes Browser Source as a way to display web-based content by pasting a URL into the source settings. Their official guide also notes that you can set width, height, FPS, and custom CSS from the same settings panel.
For StreamRio, the overlay is already a hosted webpage. You do not need to download a video file, install a plugin, or capture a browser tab. You only need the private overlay URL from your StreamRio dashboard.
Before You Add StreamRio to Streamlabs
Make sure these three things are ready first:
| Requirement | Why it matters |
|---|---|
| StreamRio account | Your overlay URL is generated from your dashboard. |
| Production Overlay URL | This is the URL Streamlabs will load as the Browser Source. |
| Streamlabs scene | Add the overlay to the scene you actually use while streaming. |
If the StreamRio dashboard shows a masked or locked overlay URL, upgrade to Pro first. Preview mode is useful for setup and testing, but the production Browser Source URL is what you paste into Streamlabs for a live stream.
Step 1: Copy Your StreamRio Overlay URL
In StreamRio, go to your dashboard and find the overlay preview panel. After your live overlay URL is unlocked, click Copy URL.
Your URL will look similar to this:
https://streamrio.com/overlay/your-overlay-key
Treat this URL like a private stream tool. Anyone with the link may be able to load the overlay view, so do not post it publicly in chat, overlays, screenshots, or stream descriptions.
Step 2: Add a Browser Source in Streamlabs
Open Streamlabs Desktop and select the scene where you want StreamRio to appear.
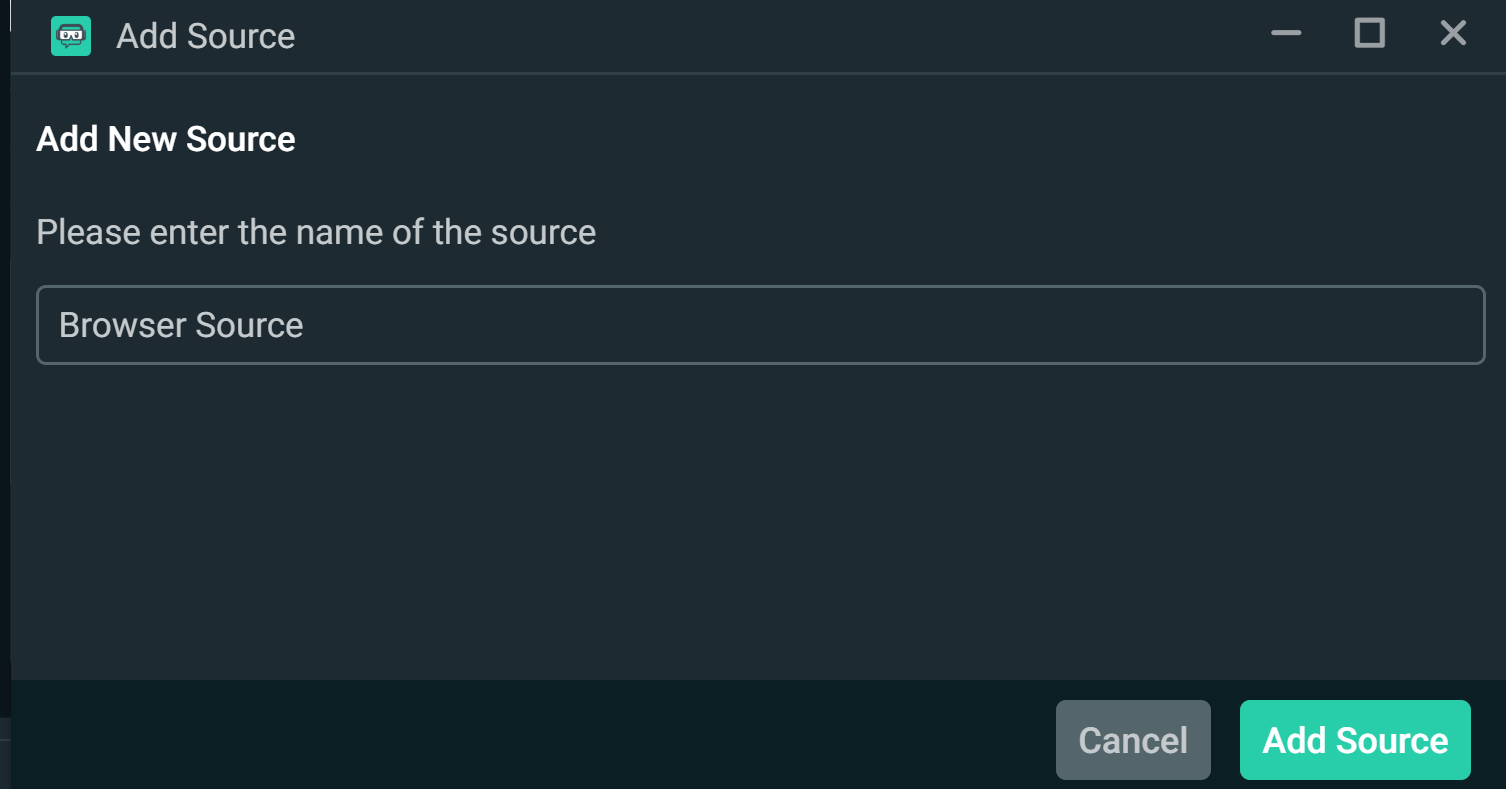
Image source: Streamlabs official Browser Source documentation, saved locally for educational setup guidance.
Then follow this path:
- Go to Sources.
- Click the plus button.
- Choose Browser Source under capture/source options.
- Name it StreamRio Overlay.
- Click Add Source.
- Paste your StreamRio overlay URL into the URL field.
Naming the source clearly helps later when you are debugging a scene with camera, gameplay, alerts, chat, and multiple overlays.
Step 3: Use the Best Browser Source Settings
For most creators, the safest Streamlabs Browser Source settings are:
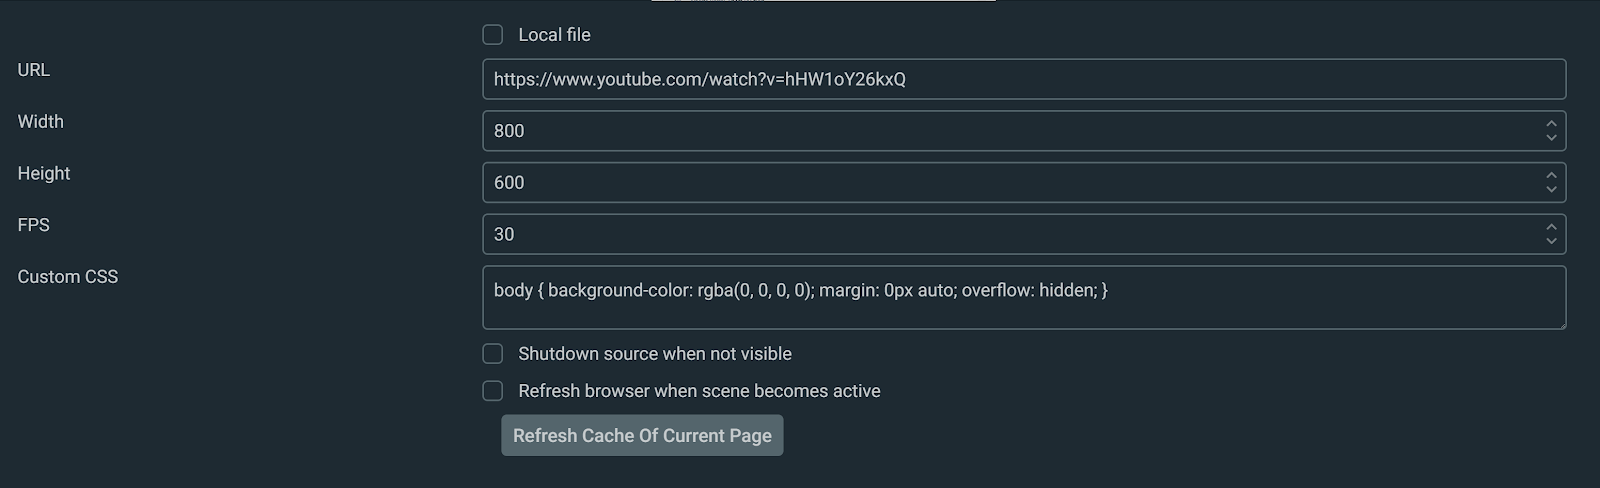
Image source: Streamlabs official Browser Source documentation, saved locally for educational setup guidance.
| Setting | Recommended value |
|---|---|
| URL | Your StreamRio production overlay URL |
| Width | 500 to 800 for most character companion layouts |
| Height | 600 to 900 for most character companion layouts |
| FPS | 30 for most streams, 60 for smoother animation-heavy overlays |
| Custom CSS | Transparent background, no page margin, hidden overflow |
Optional Custom CSS:
body {
  margin: 0;
  background: transparent;
  overflow: hidden;
}
StreamRio is meant to behave like a character companion, not a full-screen blocker. A good starting point is 600 x 750 for the Browser Source, then resize it on the canvas until the character sits naturally beside the streamer, near the bottom corner, or in another intentional safe area. Use a full-canvas 1920 x 1080 source only if you intentionally want StreamRio reactions to use the entire scene as a transparent stage.
Step 4: Put the Overlay in the Right Layer Order
In Sources, drag StreamRio Overlay above your gameplay or camera capture. Streamlabs draws sources from bottom to top, so a Browser Source placed under Game Capture may be loaded correctly but hidden behind the game.
A clean source order often looks like this:
- Alerts or chat widgets
- StreamRio Overlay
- Camera frame
- Camera
- Game Capture or Display Capture
- Background or scene art
If you want StreamRio reactions to appear behind your camera frame but above gameplay, place the Browser Source between those two layers.
Step 5: Test Before You Go Live
Back in StreamRio, use the overlay preview and test trigger buttons to confirm the reaction plays. Then watch the Streamlabs canvas and check:
- The reaction appears at the expected size.
- The overlay background is transparent.
- The reaction is not hidden behind another source.
- The animation is smooth enough for your stream settings.
- Trigger Rules match the platform events you care about, such as Twitch follows, Twitch Bits, TikTok LIVE gifts, likes, or other supported events.
If you make changes to rules or characters, refresh the Browser Source in Streamlabs or switch scenes once to reload the overlay.
Troubleshooting StreamRio in Streamlabs
The overlay is blank
Open the StreamRio overlay URL in a normal browser first. If it does not load there, check whether the URL is copied completely, whether your production URL is unlocked, and whether the overlay key is correct.
If it loads in your browser but not in Streamlabs, open the Browser Source properties, confirm the URL field, and refresh the source.
The overlay is too big or too small
If the character looks too large, reduce the Browser Source size or scale the source down in the canvas. If the reaction is cropped, increase the Browser Source height first, because character animations often need more vertical room than horizontal room.
Avoid using Transform > Fit to Screen unless you intentionally want StreamRio to occupy the whole canvas.
The overlay is behind the game
Move StreamRio Overlay higher in the Sources list. If the source is visible but still covered, check whether another full-screen source, image, or color layer sits above it.
The background is not transparent
Add the optional CSS from this guide and refresh the Browser Source. Also make sure you are using the StreamRio overlay URL, not a dashboard or preview page.
Animations look choppy
Try raising the Browser Source FPS from 30 to 60. If your computer is already under heavy load, keep it at 30 and reduce other expensive scene sources first.
A source stops when hidden
Streamlabs includes options that control whether browser sources shut down when hidden or refresh when a scene becomes active. If you frequently switch scenes, test those options before a real broadcast so the overlay reload behavior matches your workflow.
Streamlabs Browser Source SEO FAQ
Can I add StreamRio to Streamlabs without a plugin?
Yes. StreamRio works through a Browser Source URL, so you do not need a Streamlabs plugin. Add the URL directly in Streamlabs Desktop.
What size should my Streamlabs Browser Source be?
For StreamRio, start smaller than your base canvas. Try 600 x 750 for a character companion, then adjust within the same 4:5 family, such as 480 x 600 for small layouts or 720 x 900 for larger scenes. Use 1920 x 1080 only for full-scene effects.
Does StreamRio work with Twitch and TikTok LIVE in Streamlabs?
Yes. StreamRio is designed for animated overlay reactions triggered by supported Twitch and TikTok LIVE events. Configure your platform connection and Trigger Rules in StreamRio, then show the overlay in Streamlabs as a Browser Source.
Should the StreamRio overlay be above or below Game Capture?
Place the StreamRio Browser Source above Game Capture if you want viewers to see the reactions over gameplay. Move it lower only when you intentionally want another source to cover it.
Is Browser Source better than Window Capture for StreamRio?
Yes. Browser Source is the right option because StreamRio is a web overlay. Window Capture is more fragile because it depends on a visible browser window and can show tabs, browser chrome, or the wrong screen.
Final Checklist
Before going live, confirm:
- StreamRio Overlay URL is copied from the production dashboard.
- Streamlabs Browser Source URL field contains the full StreamRio link.
- Width and Height use a 4:5 character companion area, usually 480 x 600, 600 x 750, or 720 x 900.
- Source order places StreamRio where viewers can see it.
- Overlay background is transparent.
- StreamRio test triggers appear in Streamlabs.
- Your Twitch or TikTok LIVE connection and Trigger Rules are active.
Once these pass, your StreamRio overlay is ready for Streamlabs Desktop.
Screenshot and Trademark Notice
Streamlabs Desktop screenshots in this guide are saved locally from Streamlabs' official Browser Source documentation for educational setup guidance. Streamlabs trademarks, product names, and interface screenshots belong to their respective owner. StreamRio is not affiliated with or endorsed by Streamlabs.